LED lighting can last for many years, but its lifespan depends on more than the label on the box. Heat, dust, moisture, unstable power, and incompatible dimmers can all affect performance. How to maintain LED lights for longer lifespan is therefore a practical question about both the lamp and the conditions around it. A bulb installed in a sealed, poorly ventilated fixture may run hotter than expected. Dust on a kitchen fitting can also trap heat over time. Small details matter.
A useful routine begins with checking the manufacturer’s instructions and matching each lamp to its fixture and dimmer. Keep vents clear, remove dust with the power switched off, and use a dry or slightly damp cloth rather than spraying cleaner directly onto the light. Look for flickering, unusual dimming, discoloration, or a loose connection; these signs may point to a fixture, driver, or wiring issue, not a worn-out LED alone. If the cause is unclear, ask a qualified electrician instead of guessing. Replacing bulbs too early can waste money, but assuming every failure is harmless is not wise either. Maintenance cannot overcome poor product design or unsuitable installation. It can, however, reduce avoidable strain and help lights deliver steadier performance for longer.
L70 describes when an LED light reaches 70% of its initial lumen output. It does not mean the light suddenly stops working. Instead, brightness gradually declines over time. A fixture rated at 50,000 hours may still operate beyond that point, but it will produce less usable light. L70 is a useful planning measurement, not a promise of identical performance.
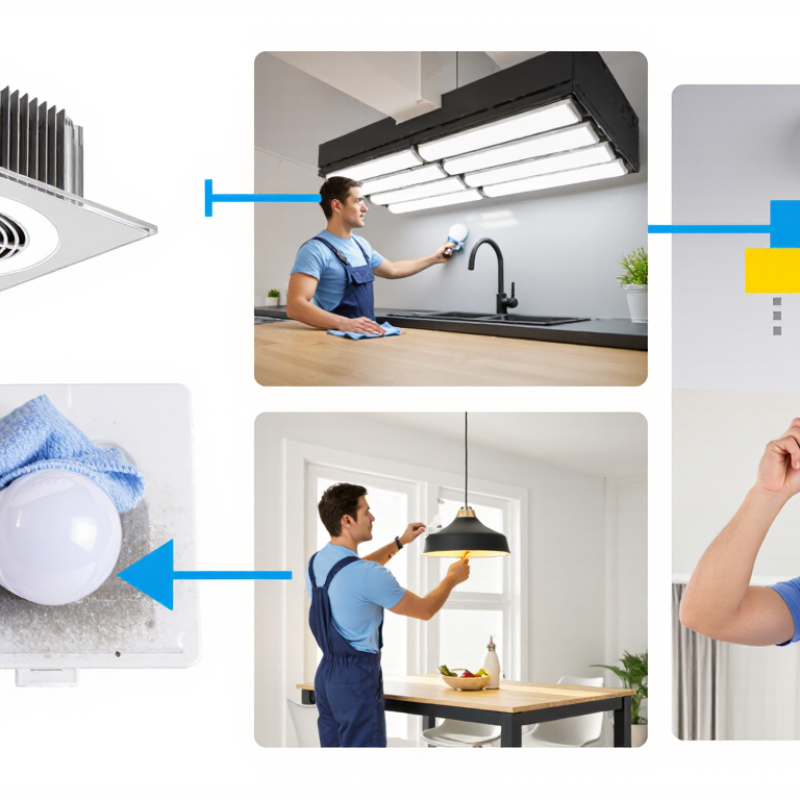
Heat is the main enemy of LED longevity. Keep vents clear and avoid placing fixtures inside tight, unventilated housings. Dust on lenses and heat sinks can trap warmth, so clean them gently with a dry, soft cloth during routine inspections. Do not spray liquid directly onto the fixture. Check connections for looseness, flickering, or unusual noise.
The driver also deserves attention. Unstable voltage and repeated switching can increase stress, especially in commercial spaces. Use compatible controls and follow the installation instructions. Measure light levels with a lux meter when a workspace seems dim. Human judgment alone can miss gradual lumen loss.
Small details matter.
In practice, maintenance schedules are often too optimistic. A clean fixture may still age quickly in a hot ceiling cavity. L70 figures usually come from controlled testing, while real buildings contain dust, heat, and voltage variation. Record installation dates, operating hours, and visible changes. This simple record makes replacement decisions more reliable.
Long LED life starts with evidence, not a printed hour claim. Request an IES LM-80 test report covering at least 6,000 hours, with measurements at regular intervals. The report should show lumen maintenance, chromaticity shift, drive current, and case temperature. These details reveal how the light behaves under heat. Not just in a laboratory.
IES TM-21 uses LM-80 results to estimate future lumen maintenance. With 6,000 hours of testing, the projection may extend up to 36,000 hours under applicable limits. However, this is an extrapolation, not a guarantee. The U.S. Department of Energy’s Solid-State Lighting reports commonly associate quality LED systems with 25,000–50,000 hours, depending on temperature, current, and operating conditions. Check the assumptions carefully.
Heat is the quiet failure factor. Keep vents clear, avoid sealed fixtures unless rated for them, and inspect dusty heat sinks twice yearly. A cooler housing usually supports better lumen retention. Our field checks often find installation temperature differs from laboratory conditions. That gap matters. Also, compare TM-21 projections with real operating records, because color shift may become unacceptable before light output appears weak. IES LM-80 and TM-21 provide useful discipline, but they cannot repair poor thermal design.
How to Maintain LED Lights for a Longer Lifespan?
LED lifetime depends heavily on temperature. Ta means the surrounding air temperature. Tc means the temperature measured at the luminaire’s specified case point. Both must remain within the limits stated on the technical datasheet. A cool room does not guarantee a cool LED. Dust, sealed housings, poor airflow, and nearby heat sources can raise Tc quickly.
The U.S. Department of Energy reports useful LED lifetimes commonly ranging from 25,000 to 50,000 hours, but thermal conditions strongly affect lumen maintenance. IES TM-21 also evaluates LED light-output depreciation through measured temperature and operating data. Therefore, installers should record Ta and measure Tc after the luminaire reaches thermal stability, often after several hours. A surface probe or calibrated thermal camera can reveal hidden heat.
Keep it clean.
Remove dust from vents and heat sinks without blocking airflow. Avoid placing high-output fixtures inside unventilated enclosures unless they are rated for that environment. Dimming may reduce heat, but it does not correct an undersized heat sink or poor thermal contact. IEC 62717 testing further emphasizes rated performance under defined operating conditions, not unlimited field use. A practical weakness remains common: maintenance teams often check brightness, but not temperature. That habit deserves reconsideration. Even a small rise above the rated Tc can accelerate driver aging and shorten useful service life. Reference: U.S. DOE, Solid-State Lighting Technology Fact Sheet; IES TM-21; IEC 62717.
How to Maintain LED Lights for a Longer Lifespan?
Clean LED lenses and heat sinks only after the fixture has switched off and cooled completely. Hot surfaces can make moisture evaporate unevenly and leave marks. In my maintenance work, a soft, lint-free cloth removes most surface dust safely. Dampen it with distilled water or a mild, non-abrasive cleaner. Never spray liquid directly onto the lens or housing.
Tips: Use a soft brush between heat-sink fins. Keep the brush dry. For stubborn dust, use low-pressure air from a safe distance. Blow along the fins, not directly into seals. Avoid metal tools, rough sponges, strong solvents, and pressure washers. These shortcuts may scratch optics or force debris inside the enclosure. Small mistakes matter.
Check the lens gasket and housing seal while cleaning. Look for cracks, flattening, gaps, or trapped grit. Wipe around the seal without pulling or stretching it. Let every surface dry before restoring power. A clean heat sink releases heat more effectively, while an undamaged lens keeps the beam clear. In dusty rooms, inspect fixtures every three months. That interval may be too long near workshops or coastal air, so adjust it after observing actual buildup. Personally, I would rather clean lightly and often than scrub aggressively after neglect.
| Maintenance Area | Recommended Interval | Safe Procedure | Tools and Materials | What to Avoid | Acceptance Criteria |
|---|---|---|---|---|---|
| Lens Surface Cleaning | Every 3–6 months, or more often in dusty environments | Switch off the fixture and allow it to cool completely. Remove loose dust with a hand-operated air blower or a soft, clean brush. Wipe the lens gently with a lint-free microfiber cloth lightly dampened with clean water or a plastic-safe cleaner. | Microfiber cloth, soft natural-fiber brush, hand blower, clean water, plastic-safe cleaner | Do not use abrasive pads, paper towels, dry scrubbing, strong solvents, or high-pressure air directed at seals. | The lens is free of dust, oily film, streaks, and scratches that could reduce light output or alter the beam. |
| Lens and Optics Inspection | During every cleaning cycle | Inspect the lens, reflector, diffuser, and optical chamber under a bright but indirect light. Look for cracks, clouding, yellowing, loose components, or signs of chemical attack. | Inspection light, clean gloves, maintenance checklist | Do not touch LED emitters or optical surfaces with bare fingers; skin oils can leave residue and reduce optical performance. | No cracks, permanent haze, deformation, loose optics, or contamination is visible. |
| Heat Sink Cleaning | Every 6–12 months; inspect more frequently in dusty or oily areas | Isolate power and let the fixture cool. Brush or vacuum dust from the heat-sink fins while keeping the nozzle and brush from striking the housing, wiring, or seals. Clean from the least contaminated area toward the most contaminated area. | Soft anti-static brush, low-suction vacuum, clean dry cloth | Do not use metal tools, compressed air at close range, water jets, or aggressive pressure that can bend fins or force debris into the enclosure. | Air passages between fins are open, fins are not bent, and no thick dust layer remains on the thermal path. |
| Gaskets and Seals | Every 6–12 months and after opening the enclosure | Check perimeter gaskets, cable glands, lens seals, and access-panel seals for cuts, flattening, hardening, displacement, or contamination. Clean sealing surfaces with a lint-free cloth before reassembly. | Lint-free cloth, inspection light, replacement gasket approved for the fixture | Do not stretch, scrape, puncture, coat, or reuse a damaged gasket. Do not apply unapproved grease or silicone to optical seals. | Seals are continuous, flexible, correctly seated, and free from gaps or trapped debris. |
| Moisture and Condensation Check | Monthly in outdoor or humid locations | Inspect the inside and outside of the enclosure for water droplets, fogging, corrosion, blocked drain paths, or damaged cable entries. If moisture is present, disconnect power and identify the entry point before returning the fixture to service. | Inspection light, dry lint-free cloth, moisture inspection record | Do not energize a fixture with visible internal moisture, and do not seal over a drainage or pressure-equalization feature. | No standing water, persistent condensation, corrosion, or blocked drainage path is present. |
| Electrical and Cable Inspection | Every 6–12 months | With power isolated, examine cable jackets, connectors, strain reliefs, grounding conductors, and terminal covers. Check for discoloration, loose hardware, cracking, abrasion, or heat damage. | Approved electrical test equipment, insulated tools, inspection checklist | Do not open or test energized equipment unless the work is performed by qualified personnel using applicable electrical safety procedures. | Cables and connectors are secure, undamaged, properly grounded, and free from overheating signs. |
| Thermal Performance Review | Annually or when brightness decreases | Compare the fixture’s operating condition with its specified ambient-temperature and installation limits. Check for blocked ventilation, excessive enclosure temperature, or a noticeable increase in thermal behavior compared with previous inspections. | Contactless thermometer or thermal camera, installation records | Do not compare temperatures without considering ambient conditions, airflow, mounting orientation, and the fixture’s specified limits. | The fixture operates within its specified environmental limits, with unobstructed heat dissipation and no abnormal hot spots. |
| Mounting and Vibration Check | Every 6–12 months and after severe weather or vibration | Inspect brackets, bolts, hinges, safety cables, and mounting surfaces. Confirm that the fixture remains correctly aimed and that vibration has not loosened hardware or shifted the optical system. | Suitable hand tools, torque documentation, visual inspection light | Do not overtighten fasteners, drill into sealed housings, or modify the enclosure without an approved procedure. | Mounting hardware is secure, the fixture is stable, and the intended beam direction is maintained. |
| Cleaning After Chemical Exposure | As soon as practical after exposure | Remove power, identify the contaminant, and follow the cleaner or chemical manufacturer’s compatibility guidance. Rinse only when the fixture’s enclosure rating and maintenance instructions permit it, then dry all surfaces before re-energizing. | Compatible cleaner, microfiber cloths, protective gloves, safety data information | Avoid solvents such as acetone or paint thinner unless the lens and seal materials are specifically rated for them. | No residue, crazing, discoloration, swelling, or loss of seal flexibility is visible. |
| Maintenance Records | After every inspection or service activity | Record the date, fixture location, observed condition, cleaning method, replaced parts, abnormal temperatures, and corrective actions. Photograph damage when useful for comparison. | Digital or paper maintenance log, inspection photographs | Do not rely on memory for recurring faults, seal replacement dates, or changes in light output. | Each fixture has a traceable service history and any unresolved defect has an assigned action. |
| Important: Always isolate electrical power before opening or servicing a fixture. Use the fixture manufacturer’s specified cleaning agents, enclosure limits, replacement parts, and electrical safety requirements when they differ from this general maintenance guidance. | |||||
How to Maintain LED Lights for a Longer Lifespan?
Use the specified driver for every LED installation. It must match the light’s voltage, current, wattage, and dimming requirements. An incorrect driver may create flicker, excess heat, or unstable brightness. I have seen lights fail early after installers used a convenient replacement driver. It seemed compatible. It was not. Check the technical datasheet before installation, and keep the driver ventilated.
The rated L70 life means the LED should retain about 70% of its original light output under stated conditions. This rating is not a guaranteed failure date. Measure output with a calibrated light meter at the same distance and angle each time. Record room temperature, operating hours, and readings. Clean the lens before testing. Dust can make a healthy fixture appear weak. A simple log often reveals gradual decline.
Compare measured output with the expected L70 trend, not only with a visual impression. Human eyes adapt quickly. If brightness drops sharply, inspect the driver, connections, heat sink, and surrounding airflow. My earlier maintenance records were too casual, so seasonal temperature changes were easy to miss. That mistake still matters. Qualified technicians should verify electrical readings and replace damaged components safely. Regular checks may feel excessive, especially when lights still work. They provide evidence before poor illumination affects work areas.
L70 marks the point when an LED produces 70% of its initial light output. The fixture may still work, but it will look dimmer.
No. It is a planning measure, not a promise. Real conditions such as dust, heat, and voltage changes can affect performance.
Ta is the air temperature around the fixture. Tc is the temperature measured at a specified point on its case.
Compare Ta and Tc with the limits on the technical datasheet. Measure Tc after the fixture has warmed up, using a surface probe or calibrated thermal camera.
Clean them during routine inspections. Use a dry, soft cloth on lenses and heat sinks, and keep vents clear.
Dimming may reduce heat, but it cannot fix poor airflow, an undersized heat sink, or weak thermal contact. That distinction is easy to overlook.
Watch for flickering, loose connections, unusual noise, or gradual dimming. A lux meter can help check light levels when a workspace seems darker.
Record installation dates, operating hours, temperatures, and visible changes. These notes help, though records alone cannot predict every fixture’s decline.
Dust, sealed housings, nearby heat sources, poor airflow, unstable voltage, and repeated switching can add stress. Small details matter.
How to maintain LED lights for longer lifespan starts with understanding the L70 rating, which indicates when an LED is expected to produce 70% of its initial lumen output. To evaluate this rating, review LM-80 test data covering at least 6,000 hours and consider the related TM-21 projections. These measurements help estimate long-term light performance and set realistic maintenance expectations.
Temperature control is also essential. Keep the LED within the luminaire’s specified ambient temperature (Ta) and case temperature (Tc) limits. Regularly clean cooled lenses and heat sinks to remove dust and maintain efficient heat dissipation, taking care not to damage seals, optics, or other protective parts. Always use the specified driver, and compare the actual light output over time with the rated L70 life. Consistent inspection, proper cleaning, and stable operating conditions can help preserve brightness, efficiency, and reliability for many years.

Guangyao Lighting